No apologies to the godfather of soul, James Brown! Maybe my favorite JB quote is about “show business”, and I paraphrase: It isn’t Show Business, Its Show, and Business!
So, on with the show…
When it comes to portable full-duplex stations for linear LEO satellites there are plenty of examples to show you the way. In some form it involves two radios held together in some fashion, and positioned so the operator can manipulate both during a satellite pass. A pair of Yaesu 817/818 radios is the standard rig. You can find them used for under $500 each, and they are very well supported by the aftermarket industry. There are several options for mounting rails that hold both radios in position and make a very solid platform. You can use this setup “naked” hung around your neck on a strap, or slide the setup into a bag that can hold an external battery pack and give the whole shebang more protection from [gestures in all directions].
In my case I already owned a Icom IC-705 which I have already crowned the modern classic that changed how we look at amateur radio transceivers and what features we expect. I used it for my first satellite contacts which were a tragicomedic lashup of the 705, a Yaesu FT-991A, an antenna on a tripod, a hand mic, headphones… The crazy part is I have a Heil Pro 6 headset! I was so wrapped around the axle and nervous I didn’t think to use it. That was not a portable setup. It was the opposite of portable. The fact that I made a few contacts on it is a minor miracle, but it did set the hook!
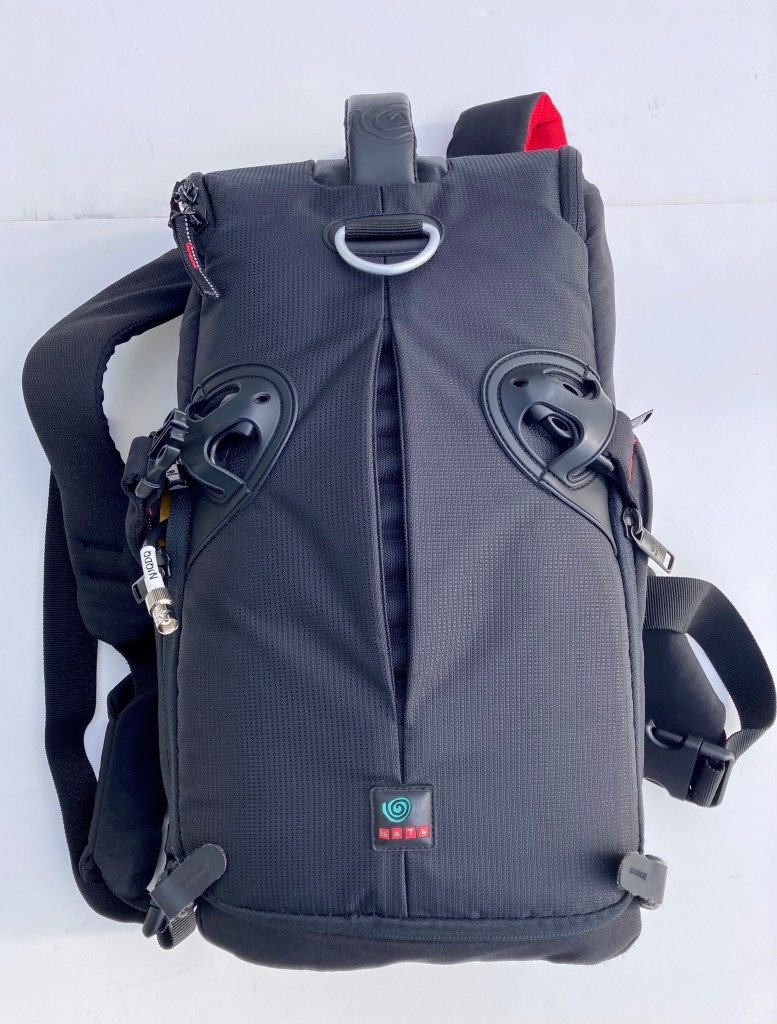
The next step was to find a suitable radio to pair with the IC-705, and the best solution IMO is the FT-817/818. I found a used FT-817ND for about $425 and started looking for a suitable bag to mount them in. I have a few camera bags on hand, and one of them is this KATA 3IN1-20 (discontinued) which was a total fail as a camera bag. The dividers were crap, the top compartment is weird, none of my gear fit in it, but I kept it because it was cheap and I’m a bit of a gear squirrel. These can be found used, and Manfrotto also sold a re-branded version with the same model number. It’s a backpack, but I use it as a sling-bag and it works great like that.
My first attempt to mount the two radios in this bag (see my previous posts for photos) involved some spare camera bag dividers and a bunch of pluck-apart foam. I just sectioned the foam into blocks and use it to support the radios. It was a cheap way to get a useful result without committing to expensive and time-consuming construction. It worked. The bag is not ideal, but it’s as close as I need it to be. The foam had a bit of give which was both good and bad, depending on whether I wanted stability, or the ability to dig my hand into the bag to deal with a loose connection (probably from the slop in the soft foam support).
I started thinking of other materials that could work. Foam-Core and corrugated plastic “coroplast” panels were one idea but I didn’t think the rigidity would be a good match for the soft bag. While doing a winter garage cleanout I came across some big blocks of PE foam from a bicycle packing box. That stuff is a good compromise between rigidity and “give”. It is often a laminated material formed into blocks from 1/8″ sheets, or solid blocks, which are often assembled into other shapes, or cut to form-fit an application. Places like ULine carry it, and I am sure you can get it cheaper elsewhere.
This material cuts beautifully with a large razor knife at full extension. Any long, sharp, thin blade would be good. If you have the laminated material you can often separate it at a seam with with your hands and maybe a little cutting.
Then came the issue of bonding. I saw a few YouTube videos and one of them compared contact cement and hot glue. Hot glue looked like a good option.
I include a link this video so you can avoid it:
IT IS NOT A GOOD OPTION!!! It makes a mess and you will be sorry you tried it. I am a bit of a grinder so I stuck with it and use it for my whole build. Don’t be me. Both contact cement and hot glue are bad options compared to hot-air bonding. You have a hot air gun for things like heat-shrink tubing? Good. Use that. Don’t have one? Get the cheapest gun that doesn’t fall apart when you look at it wrong, like the Harbor Freight gun, and use that.
Here’s another great thing about the heat gun approach. It’s great for cleaning up cut edges, any ratty sections where you had to separate or had a mistake cut, and turning a rough edge into a nice smooth one. If you get too enthusiastic you will melt through it, but blowing hot air over the surface and maybe smoothing it out with a finger is a nice way to get a cleaner finished result.
BUILD THE DAM THING ALREADY!!!
Now, on to some photos of my actual build! You knew we would get to it eventually. Thanks for hanging in there. Treat yourself to a healthy snack or just stress-eat a sleeve of graham crackers chased with a Frappuchino. Whatever. You’re great.
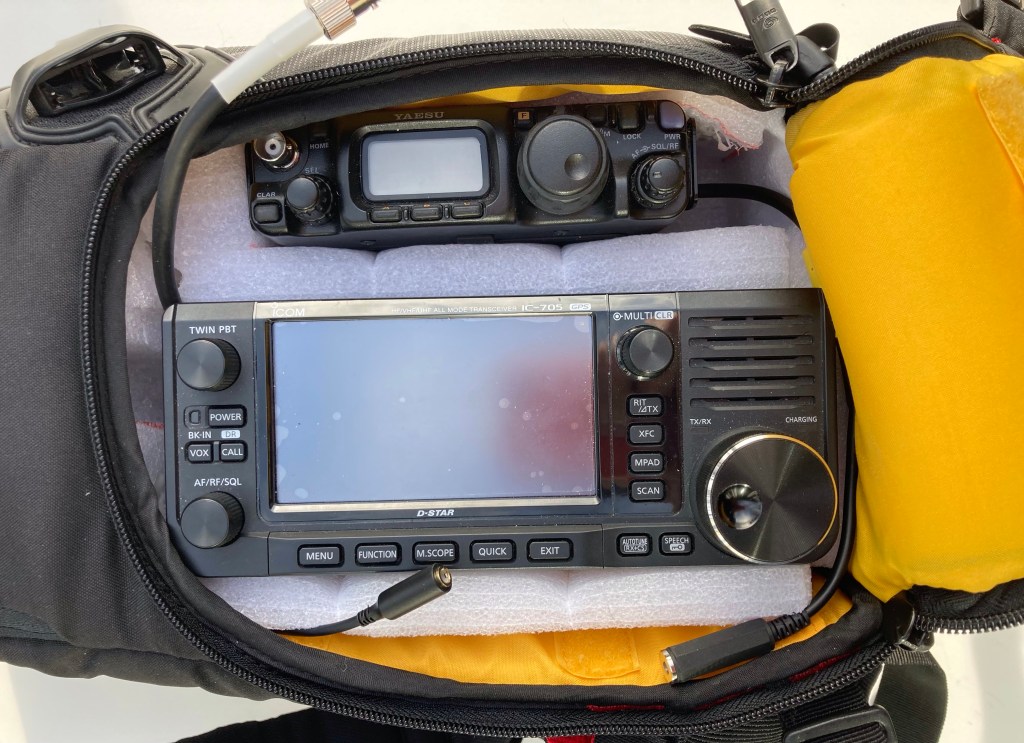
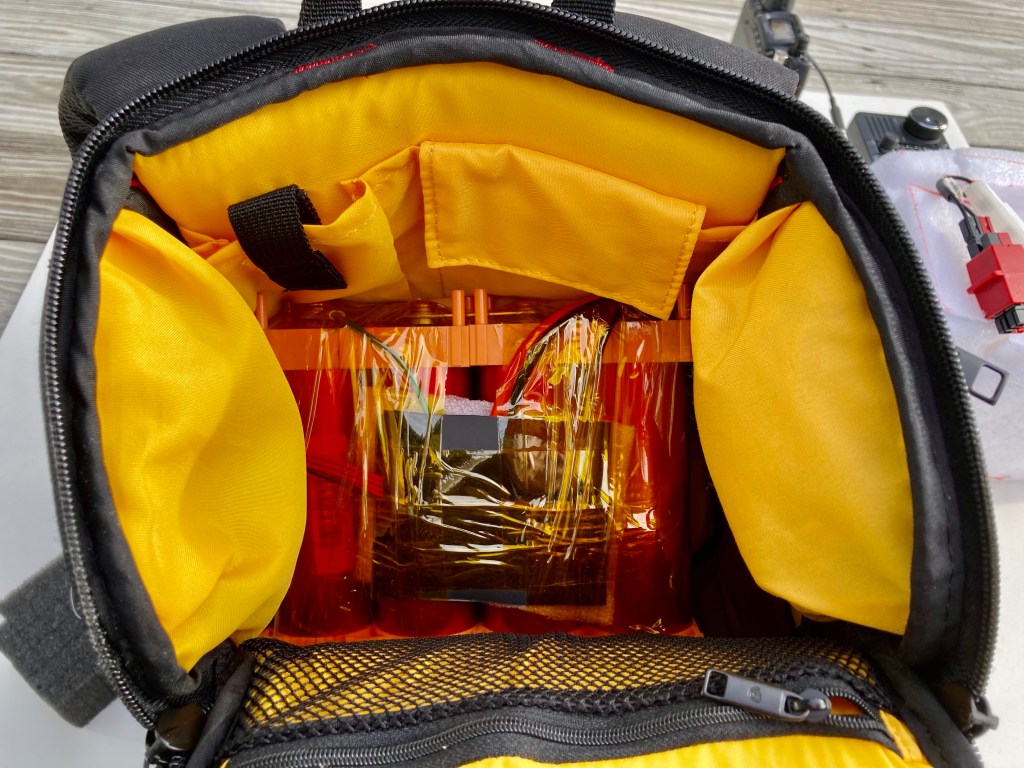
With both a radios mounted in the bag you can see how they sit in a good position. They are low enough to be protected when I close the flap, but I can still access them easily. There are a few issues. One is the IC-705 tuning dial is a little close to the flap. Another is the access to the FT-817ND front antenna connector. Also the power button on the 817 can be a little tricky. I can solve most of this by using a thinner diving panel between the radios and shifting the 705 a little to the left. I built a short jumper from LMR-240UF to get the IC-705 antenna connection into a better spot. It’s much better (not a loss magnet and SWR burglar) than those BNC Right Angle adapters. I connect the uplink coax directly to the 718ND.
You can see how the compartment extends under the Cordura on the left, so there is about 2″ of foam over there. The main compartment zippers almost completely open so I was able to insert it without bending the heck out of it.
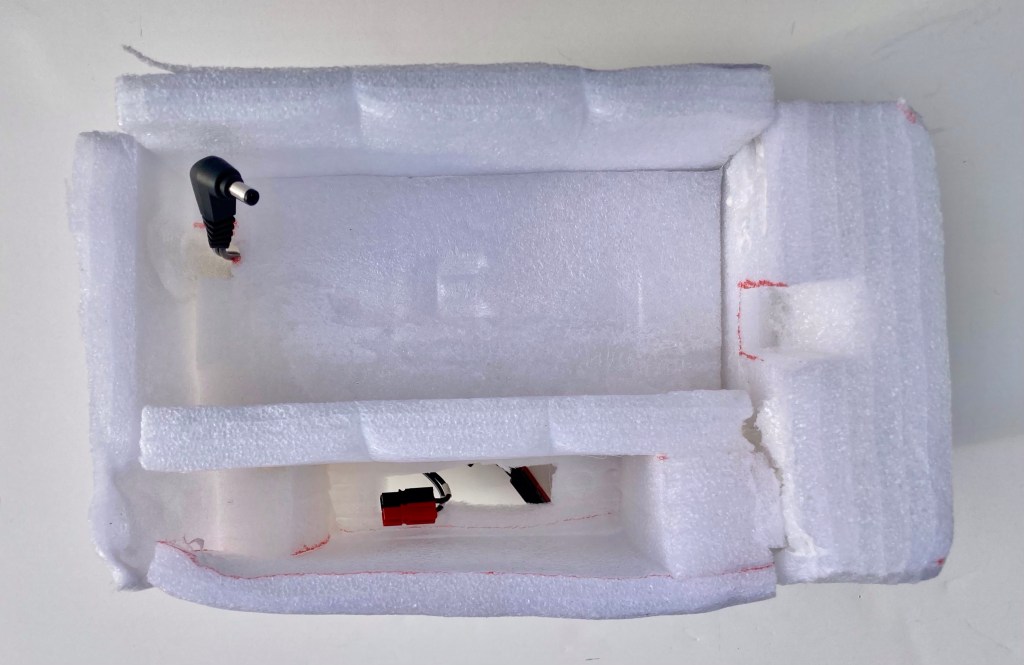
To build the foam support I just made a measure of the interior dimensions of the compartment, then positioned the radios, and mocked up PE foam blocks to get the radios to the correct height and spacing. Once I was happy with that I got to work with the hot glue (tragic, but it worked). The details are a channel for the IC-705 power cable, access to the 817’s power connector, and a recess to neaten
up the wiring harness.
On the 705 I use that BNC extension for the antenna and a short headphone extension with a right angle male to straight female connector. The mic connector I use is an Inrad Yaesu Modular Adapter, or a Yaesu AD-1-YM.

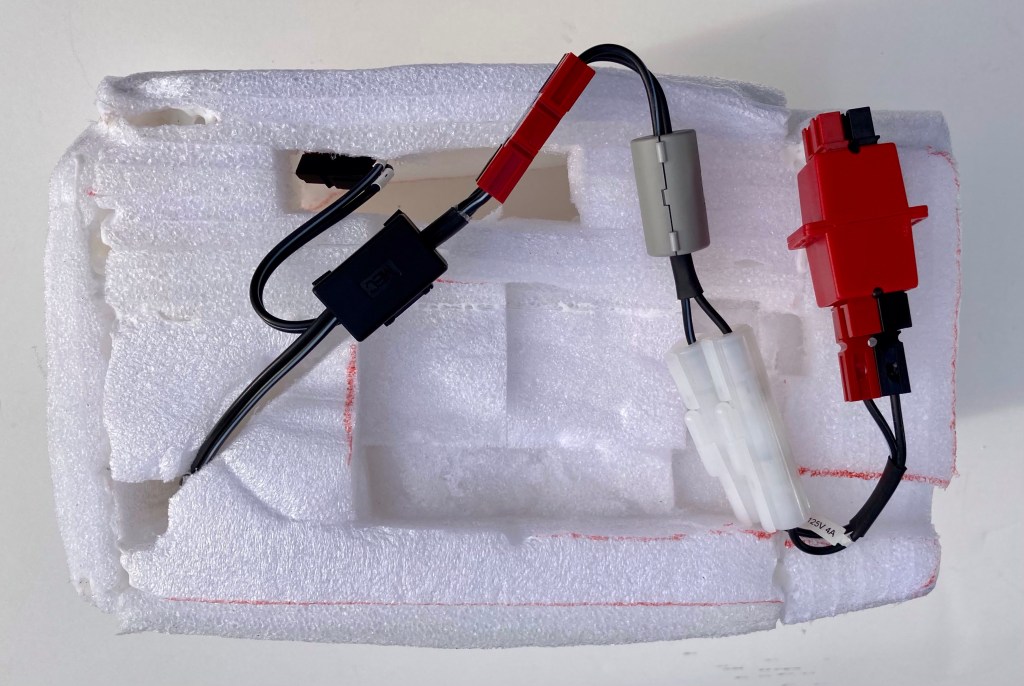
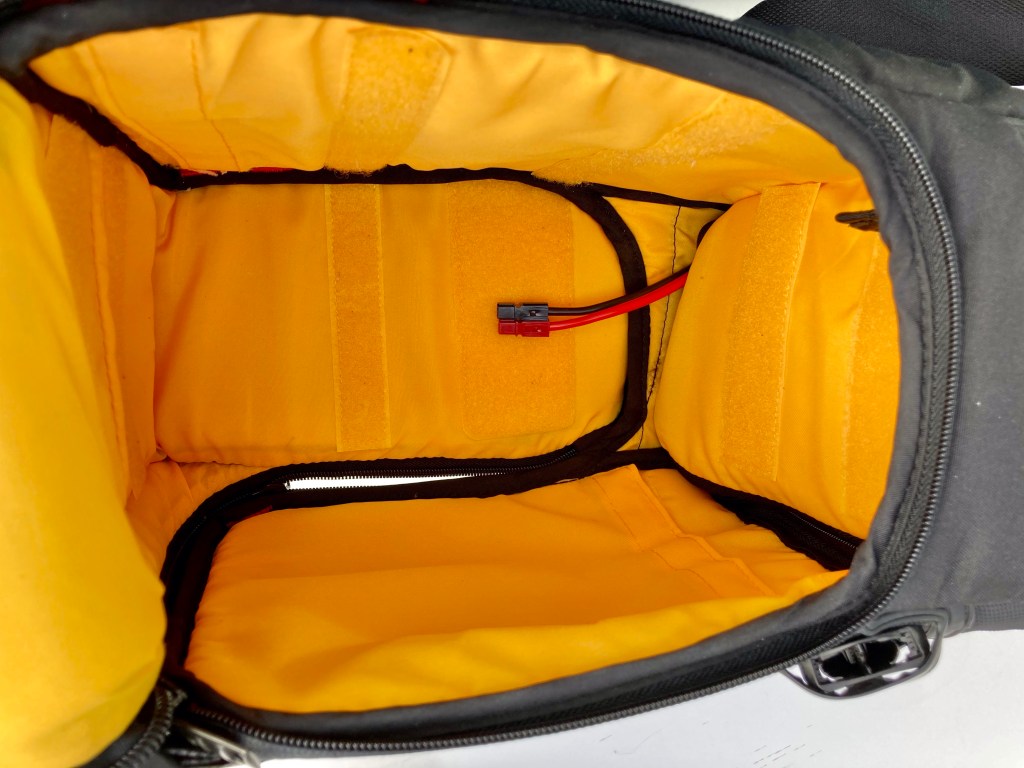
My power supply is a homebrew 8Ah LiFePO4 battery. I built it a few years ago following the OH6STN build video. It’s four Headway “Tesla Cells” in a 4S configuration with a 30A BMS. It fits cleanly in the top compartment of the bag and I can pass the power cable and connector through the zippered divider. Yes, this bag is full of zippers!
One of the best purchases I made for my power needs is a Bioenno BPC-1503CAR DC-DC charger. I snipped the automotive “cigarette lighter” plug and put Anderson Powerpoles on it, and I use it to maintain my two LiFePO4 batteries. I put a distribution block in the power harness so I can charge without disconnecting the radios, or power an accessory without needed to modify the harness.

So that’s how it all came together. I will probably build another insert but for now it is getting the job done. Here’s a shot of the rig while I am operating.

My home has this odd feature of a rooftop deck! Here’s a bonus of a deck image showing my little window to the northeast, allowing me to work some of those low RS-44 passes toward Europe. RF Noise can be an issue (Solar inverters, lights, houses…) so even though my horizon is only about 2-degrees it is not the best spot. But it’s super convenient and I can be QRV in just a minute or two.

I hope this has been helpful, and maybe edutational! If you have questions or comments you can leave them in the comments or drop me an email.
73 and See You On The Birds!
